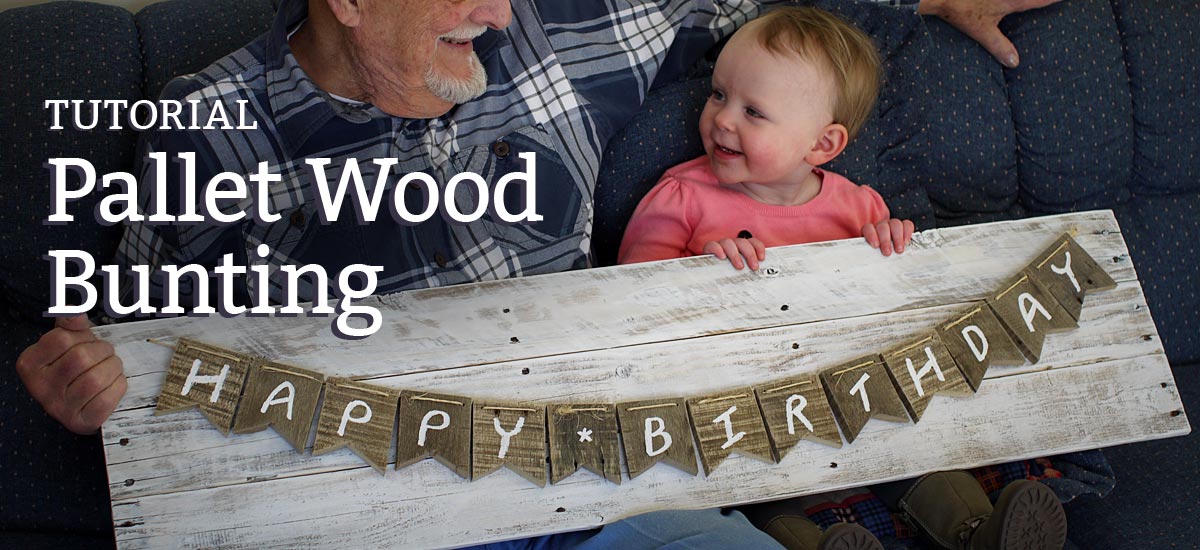
If you do a Google search for “pallet wood bunting” you’ll find almost nothing of relevance. Besides some pallet banners with paper bunting on top, there’s not much out there. I set out to change that and in this tutorial I’ll show you how you can make your own bunting with pallet wood and twine.
How to make your own pallet wood bunting
I have wanted to make my own bunting for some time and I thought this would be a perfect opportunity to give it a try. With my pallet wood bin stocked up, I grabbed a few skinny boards and got to work.
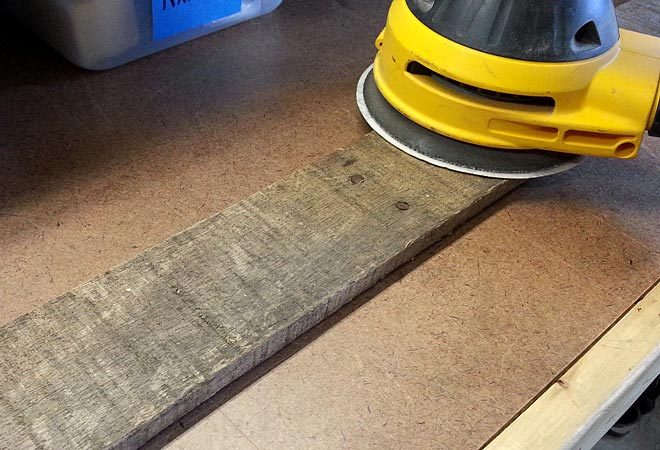
The first step was sanding. I highly recommend doing all your machine sanding first before assembly. That goes for all pallet projects, in fact. It saves time and saves your fingers from splinters while you work with the wood.
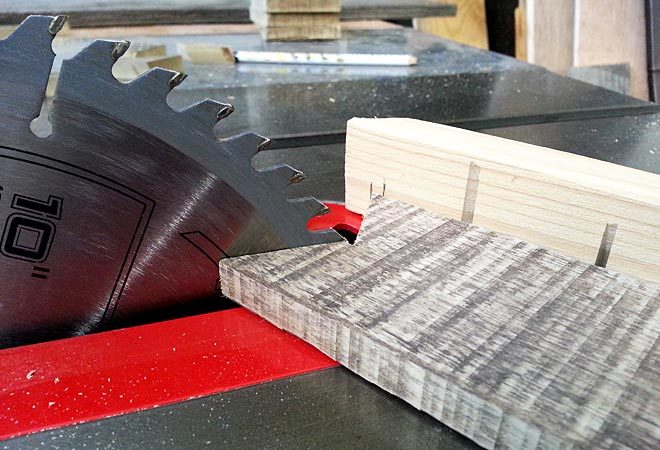
I cut all my bunting flags on the table saw. I would suggest you use a band saw if you have one as it will be much quicker that way and leave a cleaner cut. Creating things with rough pallet wood allows for a lot of slop in your finished product, so it’s just fine either way.
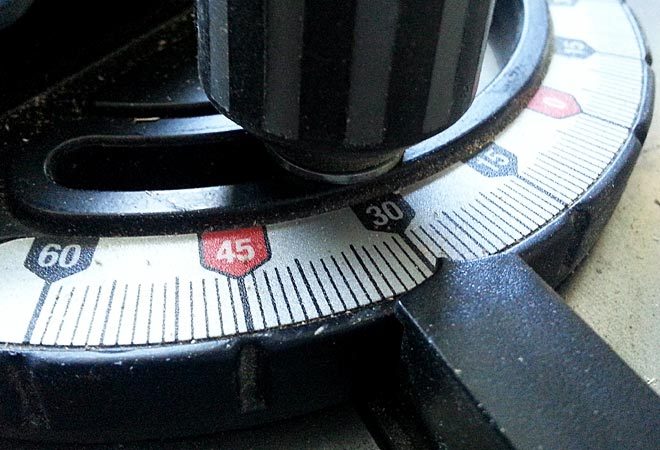
I set my miter gauge to 30 degrees to cut the tails of the flags. Depending on the look you’re after, anything from 15-60 degrees could be used.
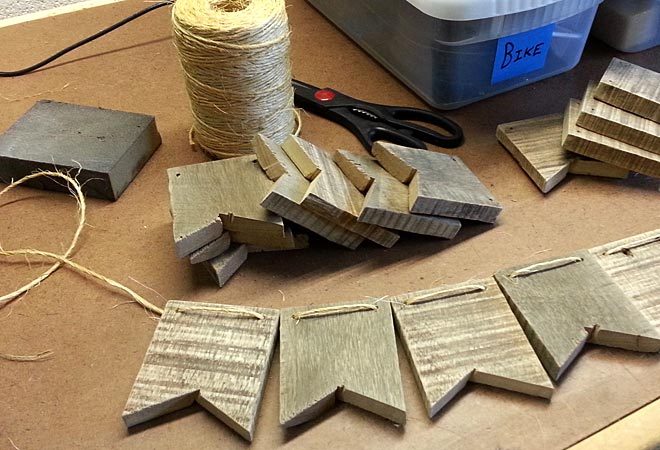
Cutting out the bunting flags
Again, a band saw would make this much easier. But if you attach a board, standing on its side, to your miter gauge you can extend its reach and get a really clean cut. I’m planning on writing a quick tutorial on this too. They make accessory miter gauges for just this reason.
I made a cut about halfway into the pallet board at 30 degrees. Then I flipped it over and made the same cut again, attempting to get a clean center angle with no overlap. To help with this, I raised the blade as high as it would go. This isn’t necessarily safe, but it does reduce the difference in cut from top to bottom on the board.
Since the blade is circular, and we’re not pushing the board completely through, the top and bottom of the cut will be at different depths into the wood. It’s something to think about when making these kinds of cuts and is much more pronounced, the lower the blade is dropped into the table.
You can see in the previous photo that I’ve marked the board attached to my miter gauge for lengths. I can position the tail end at my mark and get the exact size flag over and over.
After cutting out the tails, I reset the gauge to zero degrees and cut off the flag. A quick time-saving tip is to cut the tails at both ends of the board before resetting the gauge. You can cut your time in half at this step.
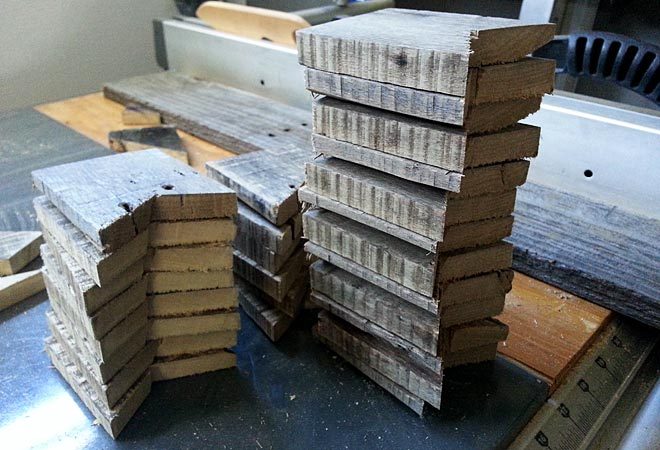
At this point I had a stack of wood bunting flags.
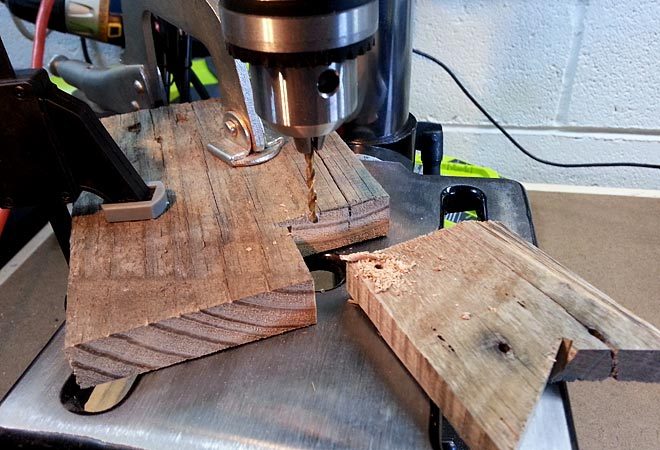
Drilling holes for stringing the bunting
I made a simple jig for my drill press to allow me to get exact holes. A notched piece of scrap wood, clamped down to the table, is all it takes. I would push the flag into the notch, drill the hole, flip it over and repeat.
After all the flags were drilled, I had to sand them again. The majority of the sanding was completed in the first step, but now the three new cuts and two new holes had to be sanded back. This part was awful. Expect your hands to hurt because you can’t use the orbital sander here. Maybe it would be possible if you have a sanding station like this popular WEN model…
I’d love to get one of those… Right after I get a band saw!

Stringing the pallet wood flags
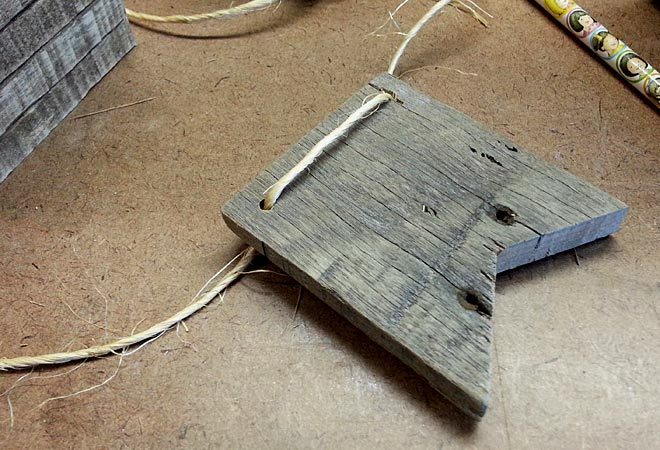
I chose natural jute twine for my stringing material on this project. It matches the rustic look of the pallet wood and it’s strong enough to handle a little weight. Wood weighs quite a bit more than paper or fabric after all.
There’s one big problem with using jute twine, however. It’s a stringy mess and it doesn’t want to cooperate. Especially if you drill your holes as small as I did, you will have trouble getting the twine through them.
You could drill super big holes, but my solution was to create a needle with the end of the twine. You read that right. I saturated the end of the twine with super glue, kept it from touching anything until it dried, then sanded it to a point.
You end up with a dull needle that easily threads through the holes and never splits. It also stops the twine from bunching up in the hole and becoming impossible to work with.
Thread through each flag and pull plenty of extra twine each time so you don’t have to go back and shimmy each flag down the line. I tied the twine at each end with just the right amount of slack so the flags wouldn’t move around.
Don’t cut your ends off yet! Leave plenty of twine on each end so you have enough to work with when it’s time to hang your bunting.
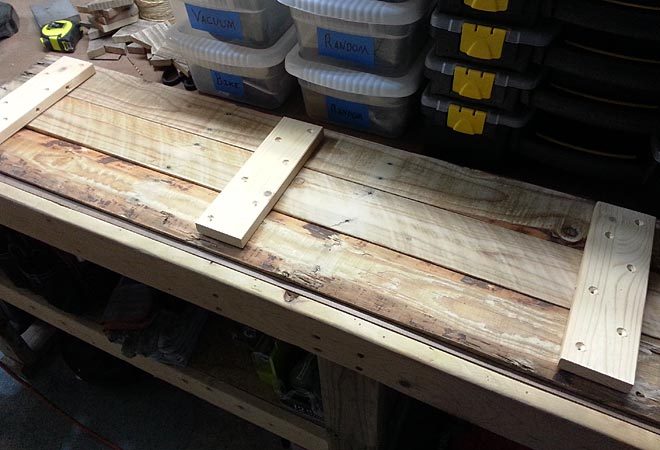
Building a pallet wood banner
We’re basically done at this point. You can decorate the flags and hang your pallet wood bunting up wherever you like. The way I strung mine meant that the flags wouldn’t stay straight up and down if hung in the air. So I knew that I would need to mount it against a wall or another flat object.
I chose to make a sign board or banner and permanently attach the bunting to it. Three pallet boards, at the perfect length, attached with backer boards. You can see in the previous photo that I screwed them in, but I also glued them for extra strength.

Once attached, I flipped the banner over and whitewashed it. You can decorate however you like, but try to maintain some contrast between the flags and the backdrop. Since my flags are staying raw wood, the whitewashed banner is a great choice.
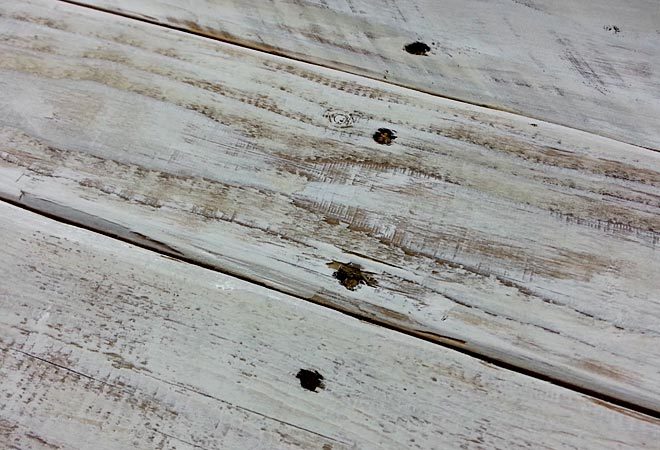
Another great option is to stain the backdrop a dark color and whitewash the flags. But look at that close up of the whitewashed pallet wood! It’s hard to argue with that.
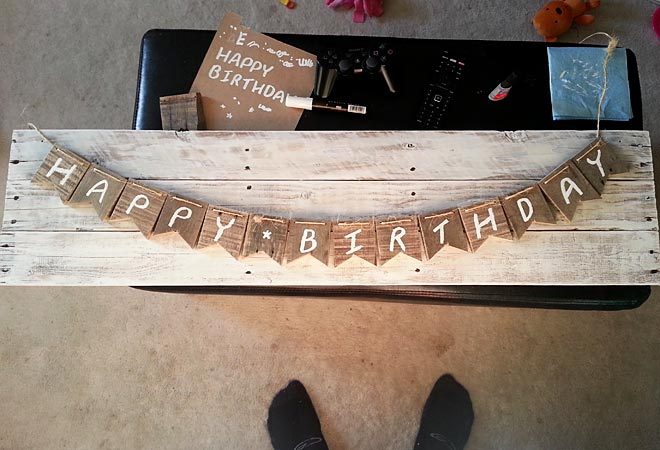
Decorate & mount the bunting
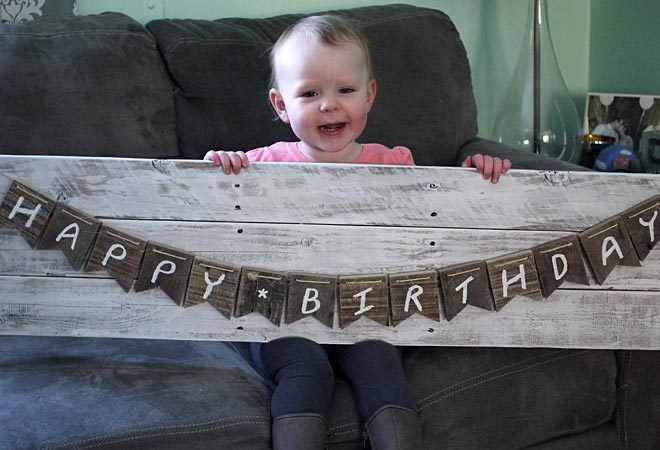
I used a paint pen to write Happy Birthday on the pallet wood bunting. I chose to use a spacer flag between the two words and decorated it with a little star. But you could also leave a gap between flags and create a natural space. Most bunting won’t have a phrase though, so you may not have to worry about this.
Lastly, it’s time to mount your bunting. I drilled two holes in the corners of my banner and inserted the ends of the twine through them. I positioned the bunting where I wanted it and tied a couple knots in the twine behind the banner.
Done!
Final Thoughts
There’s an obvious reason why my search turned up empty: this isn’t easy.
If you’re willing to do some rigorous hand sanding and get super glue all over your hands, then you should definitely give this a try. It turned out so well that I’m going to make another banner for my daughter’s room with her name on it. I’m glad I made extra flags!
This one is going to make its rounds as a decoration for family birthdays. And I’m considering selling them too. I’m wondering if any of you would be interested in buying pallet wood bunting already made. Let me know.
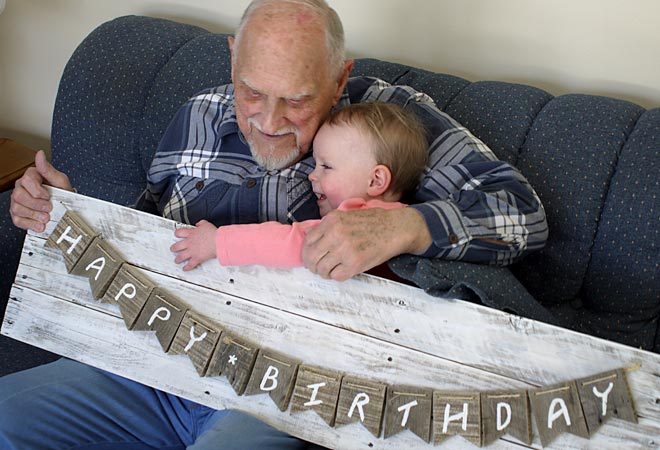
We delivered it to my grandfather to celebrate his big day. He certainly liked it and I think it’s going to make a lot of people happy.
Next time you search for pallet wood bunting on Google, maybe the Recharge Workshop will come up.
What do you think?
Are you going to try it? Share your thoughts and projects down in the comments below.