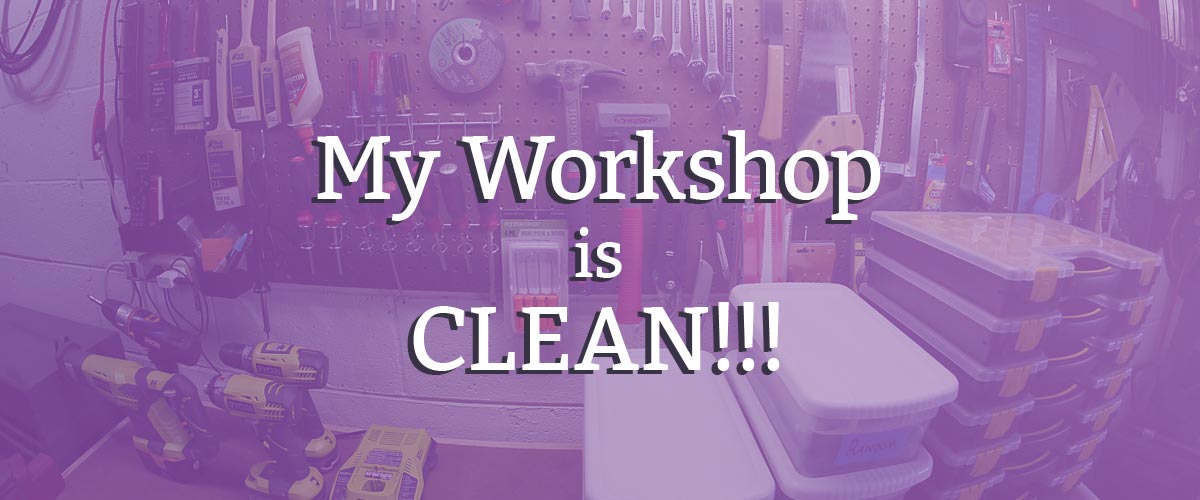
A clean workshop is on everyone’s to-do list. It’s been on mine for years. And when I launched this blog just two months ago, I decided my first project was to finally organize my workshop. If you follow @RechargeWorkshop on Instagram, you’ll remember I said this was going to be completed five weeks ago! Oops!
Well it’s done now. So here’s what I did and what I learned.
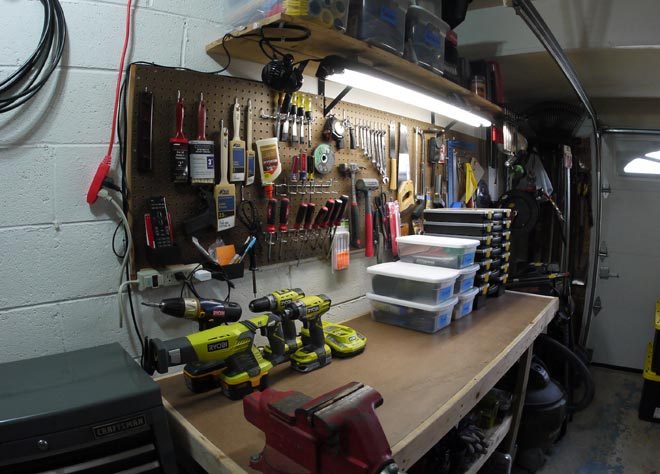
Setting up a clean workshop in a tiny garage is very tough. With so many tools needing a home, it gets overwhelming quick. Once a mess forms, it can seem impossible to fix. Without a plan and a bit of dedicated cleanup time, you’ll fight uphill forever. Get those two things together, though, and it’s not only possible, but it’s also fun!
Here are the three lessons learned in my clean workshop pilgrimage.
1. Think vertical.
The amount of space available for storage in a small garage workshop is defeating. Maybe you have a basement workspace or a guest bedroom studio. Height just isn’t your friend in these scenarios. Wall space is at a premium and you have to leave room to work after all.
I’ve found that utilizing the full vertical space of your walls and shelves is key. I was using the space above my workbench and above certain tools, but as I realized, I wasn’t capitalizing on all of the available space in those areas.
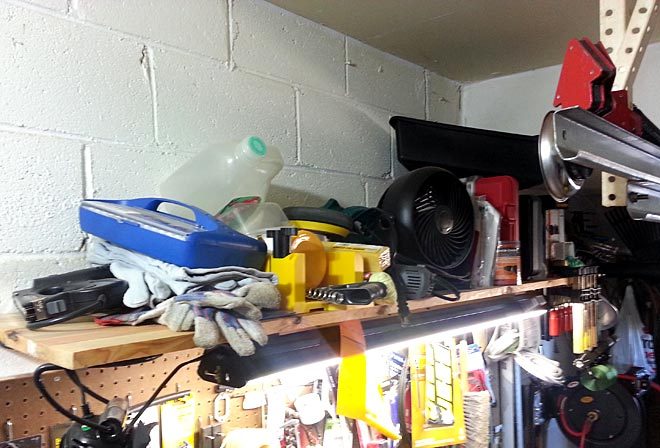
This shelf was installed when I built my workbench a couple years ago. It was very helpful at the time. I had tool cases that I needed easy access to, but didn’t want them in my way.
The problem was, I only had one shelf, but about two and a half feet between it and the ceiling. So my individual tools and cases, which don’t stack, were lined up across the shelf, but nothing could be put above them.
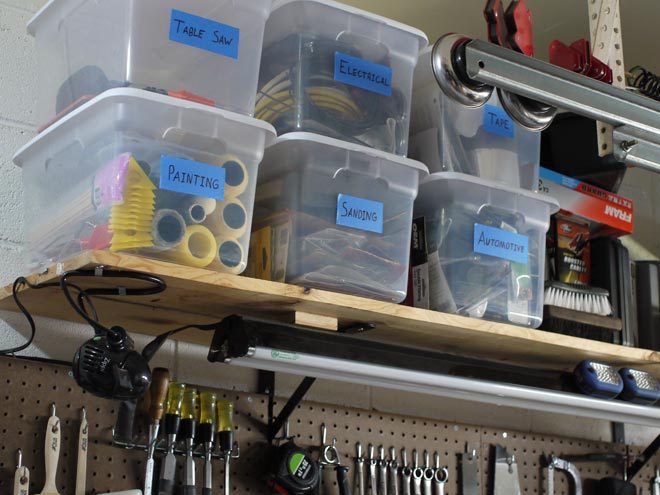
I bought these clear storage boxes for just a few dollars each, but they have afforded me so much potential. I’m planning on getting more, but for now I have six categories of tools or supplies that have a home and use up the space above my workbench efficiently.
You can find those 20-quart storage boxes here.
I can just as easily access the things on this shelf as before. Except now, I know where smaller things belong and I can stack the boxes, using up more of the space above my head and leaving my lower shelves and work area free.
2. There’s nothing wrong with hiding your stuff.
There’s nothing wrong with throwing it out either.
As you’ve seen in #1, and you’ll see again in #3, storage containers played a huge role in this clean workshop project. I love it when everything has a designated place. It takes the guesswork and stress out of cleaning up. One of the hurdles to achieving this is limiting what gets a designated place.
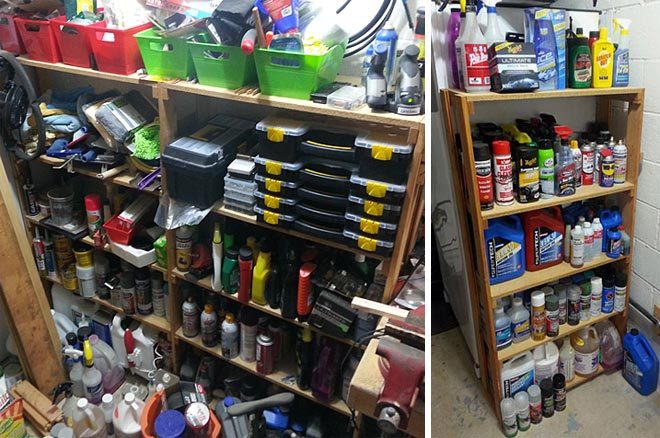
Here on the left, you see my two sets of shelves. I used the top shelf for some dollar store bins as a previous attempt at organization. The problem with them was how flimsy they were, the lack of a lid for stacking, and the inefficient shape. An all-around failure.
Look at how much used to be on the floor! But now I’ve got only one shelving unit. And just about everything fits. How?
Aside from improving my shelf-filling technique, I made two big changes. First I threw out anything that was old or I didn’t think I’d use any time soon. There were a lot of almost empty spray paint cans and cleaning products. I consolidated what I could and then pulled the trigger on the rest.
Second I reallocated other spaces in the workshop for things that were inefficiently stored on these shelves. Some went into storage containers and some on the newly realized peg board.
Speaking of peg board…
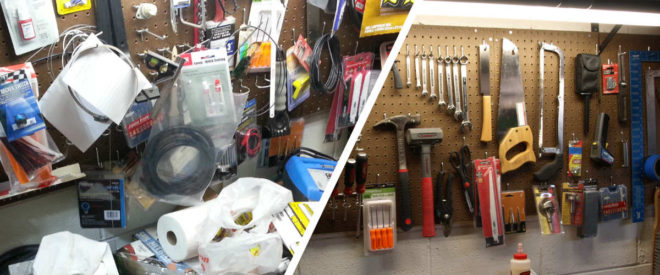
If you haven’t seen it, go check out my post on my peg board do-over. I watch the time-lapse video every few hours to make me happy. It’s one of the most fulfilling things I’ll do all year. I recommend a peg board for your workshop, and I recommend you organize it similarly. It’s an absolute dream to have a showcase-like spot for your most used tools.
I ended up throwing out a lot of stuff. That’s exactly what it was. Stuff. But I hid even more.
If I had a large shop, I’m sure I could find a place for every single tool to be out and accessible at all times. But that’s just not practical in an average garage/shed/basement workshop. So I had to come to grips with making some of my tools (mostly the larger ones) inaccessible for the greater good.
I realized that I had the wrong impression about hiding my tools. If packed away neatly enough, in labeled boxes and cabinets, the space savings far outweigh the cost of accessing the tools when I need them. By having to spend one minute getting the circular saw out of storage, I actually save myself maybe ten minutes during that same project because I have more room to work and easier access to my smaller and more frequently used tools.
3. Containers solve problems.
Honestly, this whole post seems to be about containers. That’s simply because they are the main reason my workshop is now clean and I have so much more confidence in my ability to keep it clean in the future.
If you take anything away from my words, take this:
When organizing a space, containers are worth the money.
Of course, you can feel free to make some containers if you like. A recent 4 Pallet Friday post was on just that topic. Save money where you can, but a storage container will make everything easier to clean up.
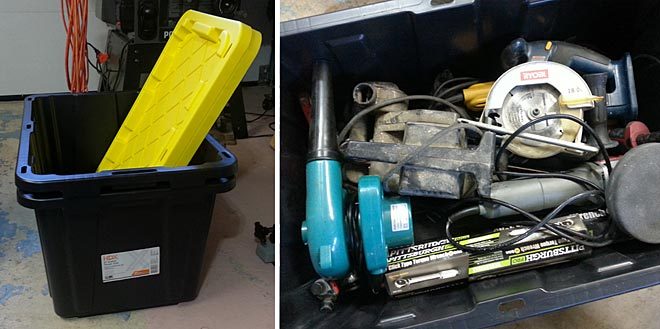
I was struggling to make a dent in this cleanup project. I had a mess everywhere I looked and nothing made sense. Once I decided to just go ahead and make the purchase of some large storage boxes, everything changed.
These sturdy, 27 gallon boxes stack well and I love them, but you can find them much cheaper at Home Depot.
The biggest thing that changed was my mind. I had wanted to avoid spending money on anything if possible. But after seeing how much I could put in one of these large boxes and get out of my way, I went back and bought more!
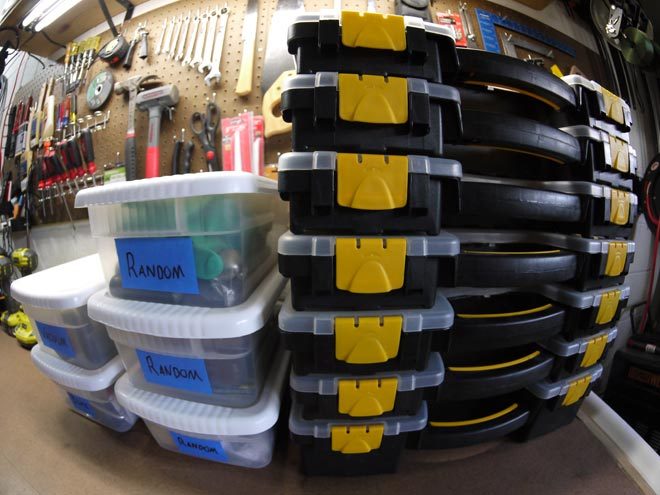
These Harbor Freight parts bin storage cases on the right are incredible. They keep your parts and hardware organized and easy to transport. The clear containers on the left are roughly the size of a shoe box, but they are perfect for small collections, like bike tools and vacuum hose accessories. As you can see, they are also a great way to temporarily store random things until you find a better place for them.
If you’re interested in some parts bin storage cases, you can find the Harbor Freight style here or another, similar style here. Those shoe boxes are really affordable too.
I need to make a storage case for my storage cases.
But for now, these two stacks of containers on my workbench are nothing to stop me from being productive. I don’t think stacked containers take away from a clean workshop. It sure beats a pile of stuff.
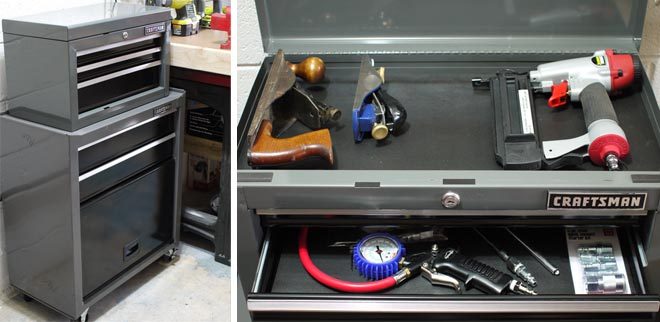
This little beauty was a last-minute addition to my workshop. Typically found in a mechanic’s arsenal, a tool chest is actually quite useful for woodworkers and crafters alike. With a top lid for things you don’t want sliding around in drawers, and a larger bottom compartment for big tools or maybe boxes, a tool chest is a container with built-in organization.
I got this Craftsman tool chest for less than half price by searching Craigslist. It was very dirty and had a huge dent in the back corner that kept the drawers from functioning properly. I hammered out the dent, gave it a thorough cleaning, and made some cheap drawer liners. Now it looks brand new and I can’t wait to fill it up with more tools!
I find that this tool chest is a fantastic companion to my peg board. If you don’t have a peg board, it would make a great replacement as well. The bigger your tool collection, the bigger a tool chest you’ll want to own. But even if you don’t find a sweet deal, it will be worth the money you spend.
I can finally breathe.
A truly clean and organized workshop is a thing of beauty. For so long I’ve avoided going out to my garage. I didn’t want to start new projects and I didn’t want to finish the ones I had already started. It was truly depressing to have a messy workshop.
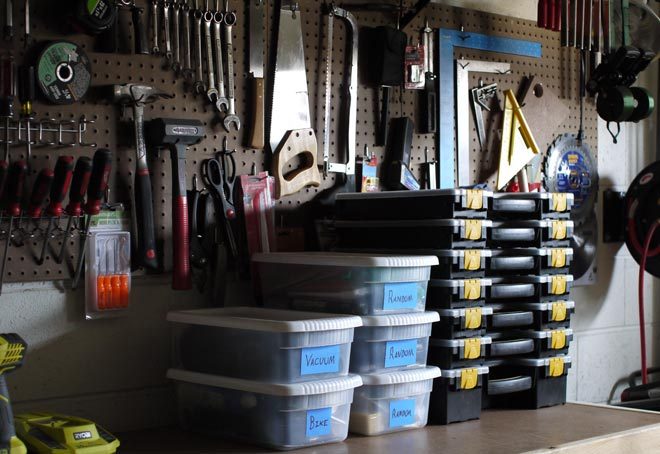
The depression is gone with this photo! Just look at that workbench area. I can feel a project or two coming on already. Or maybe three, or four, or five….
Share your clean workshop success story…
In my mind, this project was an epic struggle. It was also a huge success. Your messy workshop can be your clean workshop too. If you’ve already conquered your mess, share what you learned and how you keep it clean in the comments. If you’re not sure where to begin or if you even have the willpower to fight, let me know too! I’d love to help you and I’m sure other people could share their great ideas and give you the inspiration you need.
Happy organizing!

