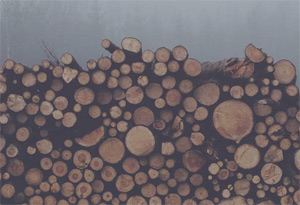
The internet loves a good pallet wood shelf! There are too many versions to list, but one that is usually missing is the simple pallet-board-attached-to-wall shelf. If done correctly, it can work out wonderfully and look fantastic. Here’s my tutorial for a basic pallet board shelf.
In preparation for this project, I created some really neat, custom brackets for mounting my shelf to the wall. They turned out to be perfect for this use and even though they look cool, you can’t see them. That was the point though…
Go check out that post here: Make Your Own Low Profile Shelf Brackets
If you don’t want to make them, that’s fine. Any corner brackets will work.
How to build the most basic pallet wood shelf
My wife and I have lived in this house together for almost four years. I probably should have renovated our upstairs bathroom a long time ago. Oh well. Now that we’re looking to sell our house, it’s time to spiff everything up.
There was a medicine cabinet on the wall above the sink. It was horrible. I ripped it down.
With the old, ugly, medicine cabinet replaced by a large, framed mirror, I knew we were in trouble. Organization was going to be a problem and finding room for all the things that used to live in the cabinet was a priority.
I decided a shelf would work but I didn’t want to buy one. I wanted to make one and add a lot of character to this space. #palletproject
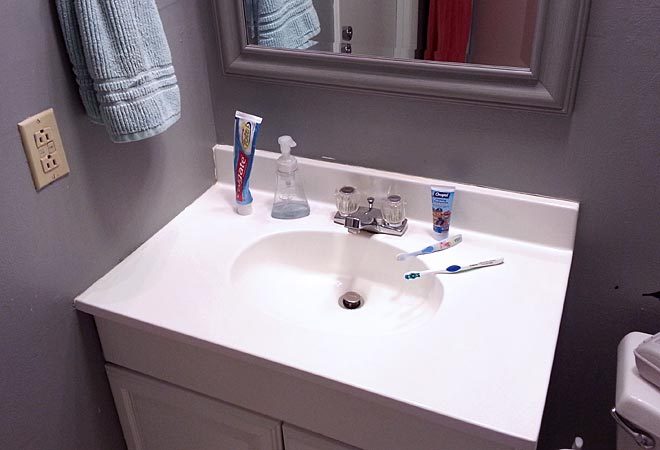
Before…
This was our bathroom sink a couple weeks ago. It’s deceptively clean and clutter free in this photo. It’s usually covered in way more stuff. A comb, a razor, shaving cream, my wife’s contact lens case, random junk I never know where it came from, etc.
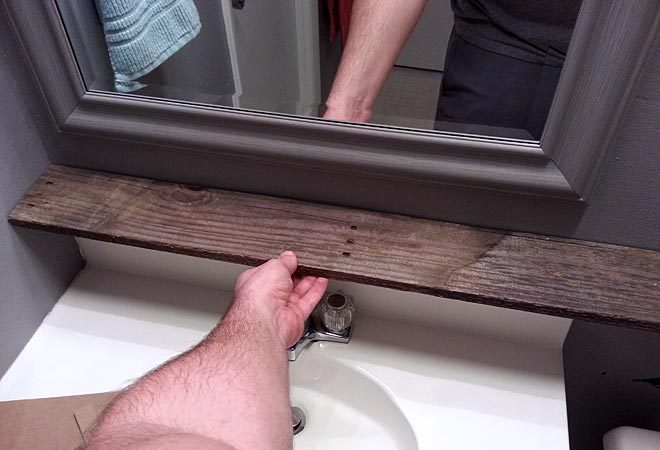
Test fit.
I picked out a fairly straight pallet board from my stash and did a test fit for placement on the wall. Just about center of the gap between sink and mirror was where I decided to hang the shelf. I marked the length of the shelf and made the cut on the left, so I’d have a natural edge on all exposed sides when the cuts were pushed up against the wall.
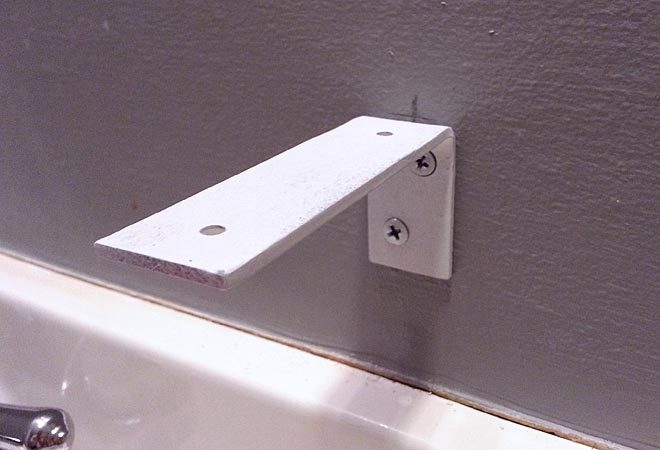
I didn’t show it in the low profile shelf brackets tutorial, but I painted the brackets white when I was done fabricating them. This was so they were primed for painting to match the wall. Here I’ve mounted them to the wall, screwing them directly to the studs, after pre-drilling the holes. If I couldn’t hit the studs, I would definitely use drywall anchors.
You can see two photos back that during the test-fit of the pallet board, I had decent gaps in a few places along the wall. In most homes, walls aren’t flat. In most countries, pallet boards aren’t straight.
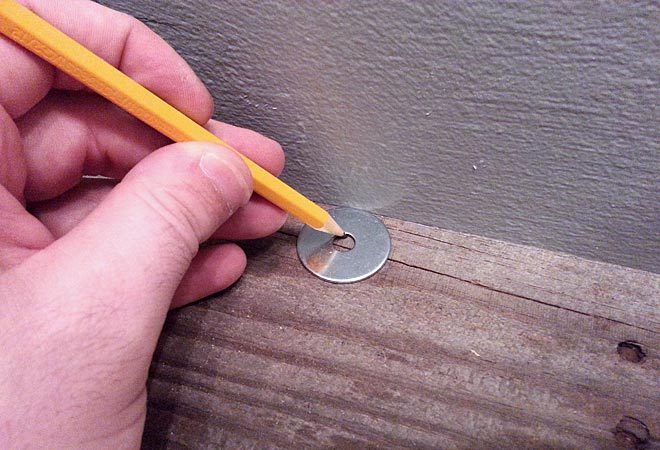
I wanted a tighter fit, so I scribed a line on the wood by following the wall. You can do this with a compass, a fat pencil, or a washer…
The Pencil & Washer Scribing Trick
If you don’t have a compass (or you can’t find yours which is always my problem) you can scribe a line with just a pencil and a washer. Here I’m using a fender washer, which has thicker walls, because I want to remove a bit more of the board’s width anyway. All you really need is for the distance to the wall to be at least as far as the largest gap. So in most cases, any washer will work fine.

The pencil line wasn’t showing up very well on the dark wood, and I wanted an easy way to see the line while cutting. So I used painter’s tape to follow along the pencil mark and give me a very obvious cut line.
A band saw is the obvious choice for this cut. I don’t have one. A jig saw is the next choice. I hate my jig saw. So I did something fairly dangerous and cut my meandering line on the table saw. Don’t try this at home and all that, but it actually worked out fine and I was extra careful to never really do more than kiss the blade. So kickback wasn’t a concern.
One little tip: tilt the blade a few degrees and make the cut so the top edge is the widest point of the board. This will help get an even tighter fit against the wall and rule out any issues with bumps or unevenness that might interfere with the back of the board.

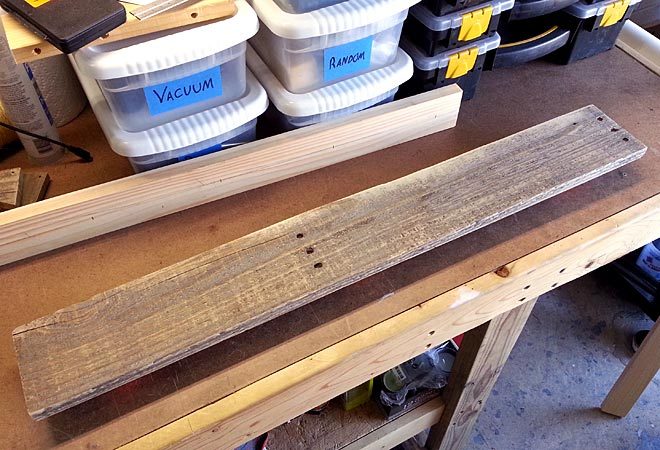
Here you can see the board cut to length and fit to the wavy wall quite well. At this point, you can now mark and drill the holes for mounting the board to the brackets. I didn’t have any trouble because I had a stubby pencil, but it was kinda tight under there.
Finishing
I sanded the pallet board in preparation of finishing. I used 150 grit sand paper on my orbital sander. If you want to get a smoother finish, start with something below 100 grit and work your way up. But, if you want a rough finish that leaves more of the natural weathering of the pallet wood, only use the higher grit.
The 150 grit didn’t take off as much, but I was able to get rid of any sharp or extra rough spots without needing to switch paper or spend much time at all. I used a sanding block to ease the corners.
You’ll want to choose a finish to match the look you’re after, but also the protection you need. You can also leave the wood raw, but if anyone is going to touch the shelf, it’s a good idea to protect it and you’ll be protecting your hands from whatever might be in that wood. Pallets have a rough life before we turn them into art and furniture. Who knows what could have spilled on them.
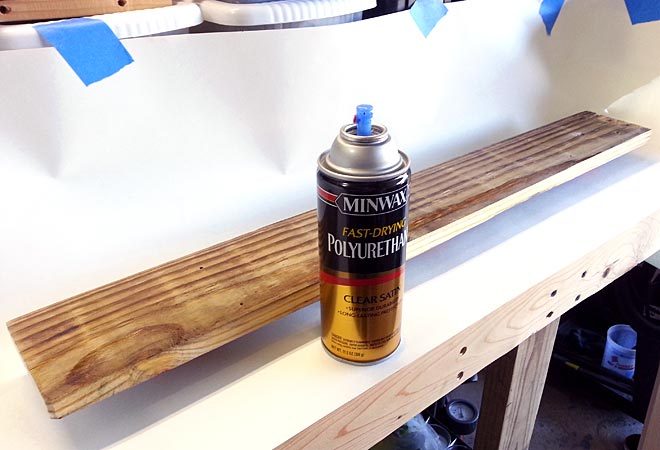
I chose a clear satin polyurethane because it was the only one on my shelf in a spray can. But it’s honestly perfect for my application. Satin is the least glossy finish you want in a kitchen or bathroom setting where water and dirty hands will be constantly touching it.
I didn’t want the shelf to be too glossy or it would lose some of its rustic charm, so satin was perfect. I think I gave all sides four coats, but it may have been five. You want a lot of coats if you’re putting this above a sink!
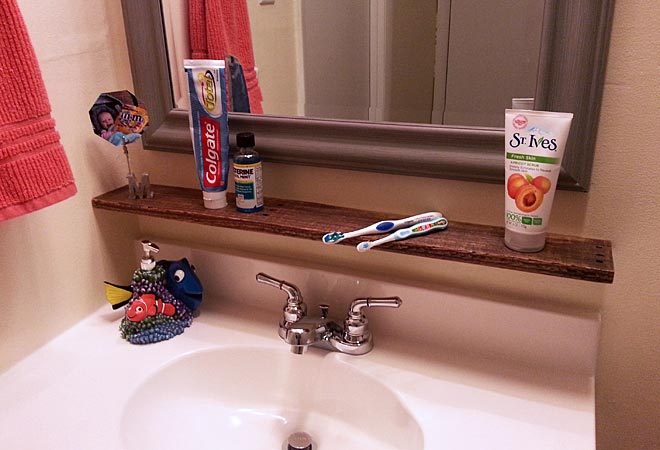
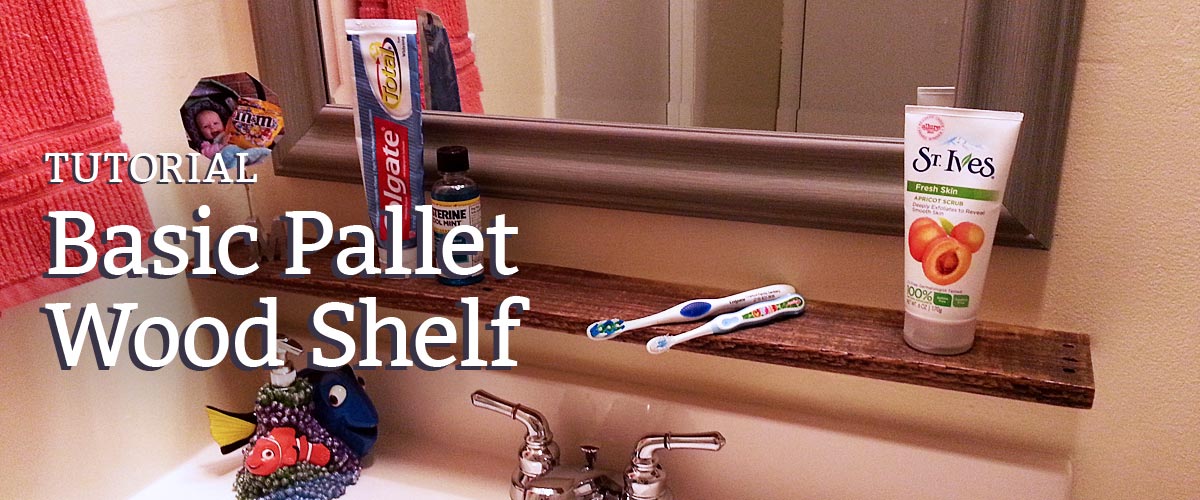
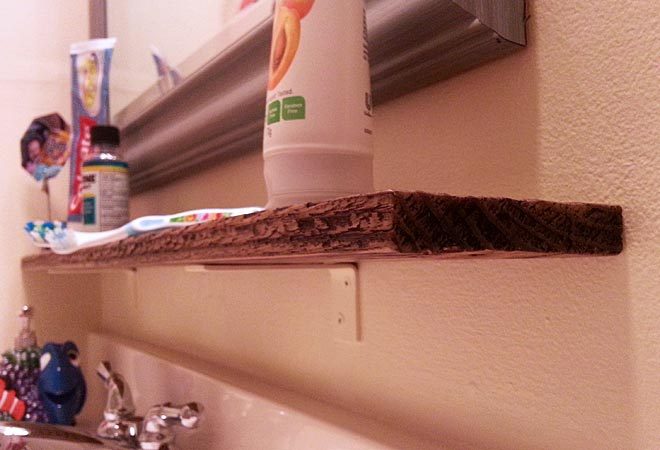
All finished. The most basic of pallet wood shelves.
And there it is! Looks really nice, feels really nice, and with those homemade brackets, it’s super strong. I’m very happy with how it turned out. My wife is too.
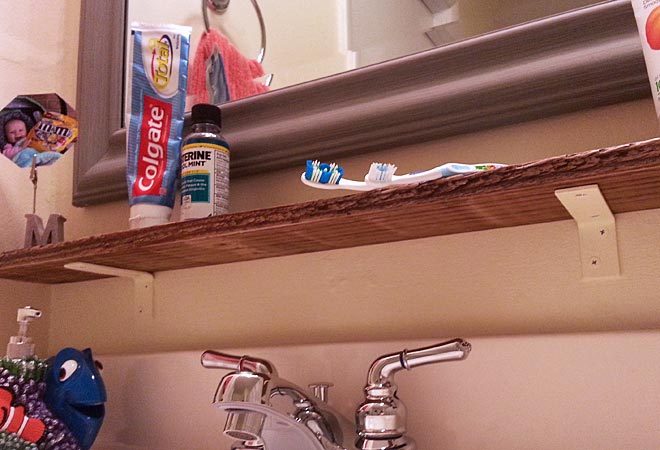
The walls were painted a light yellow and the brackets were painted too. I just left them up on the wall to make it easier. You really can’t tell that they’re under the shelf unless you duck down and look from this angle.
An absolute success!
Now I need to make a toothbrush holder to compliment this really beautiful pallet wood. And I won’t show you, but I fully expect a bunch of junk to migrate to this sink very soon. At least I’ll have these staged photos to remind me of how nice it could look.
Thanks for checking out this simple pallet wood shelf. It probably couldn’t get any more basic than this, right? If you have a simpler shelf, share it below in the comments. If you make this, let me know. Or just share your thoughts. I’d love to know what you think!